Welcome
A quick tour of the nua site dashboard and how this guide is organized.
The nua site dashboard is where you manage everything about your website: you turn an existing site into a fast, modern one, publish it, and then keep an eye on traffic, forms, and more — all from one place. You'll find it at dash.nuasite.com.
This page is a map. It explains how the dashboard is organized and points you to the right place for each task. If you're opening the dashboard for the very first time, start with Signing in.
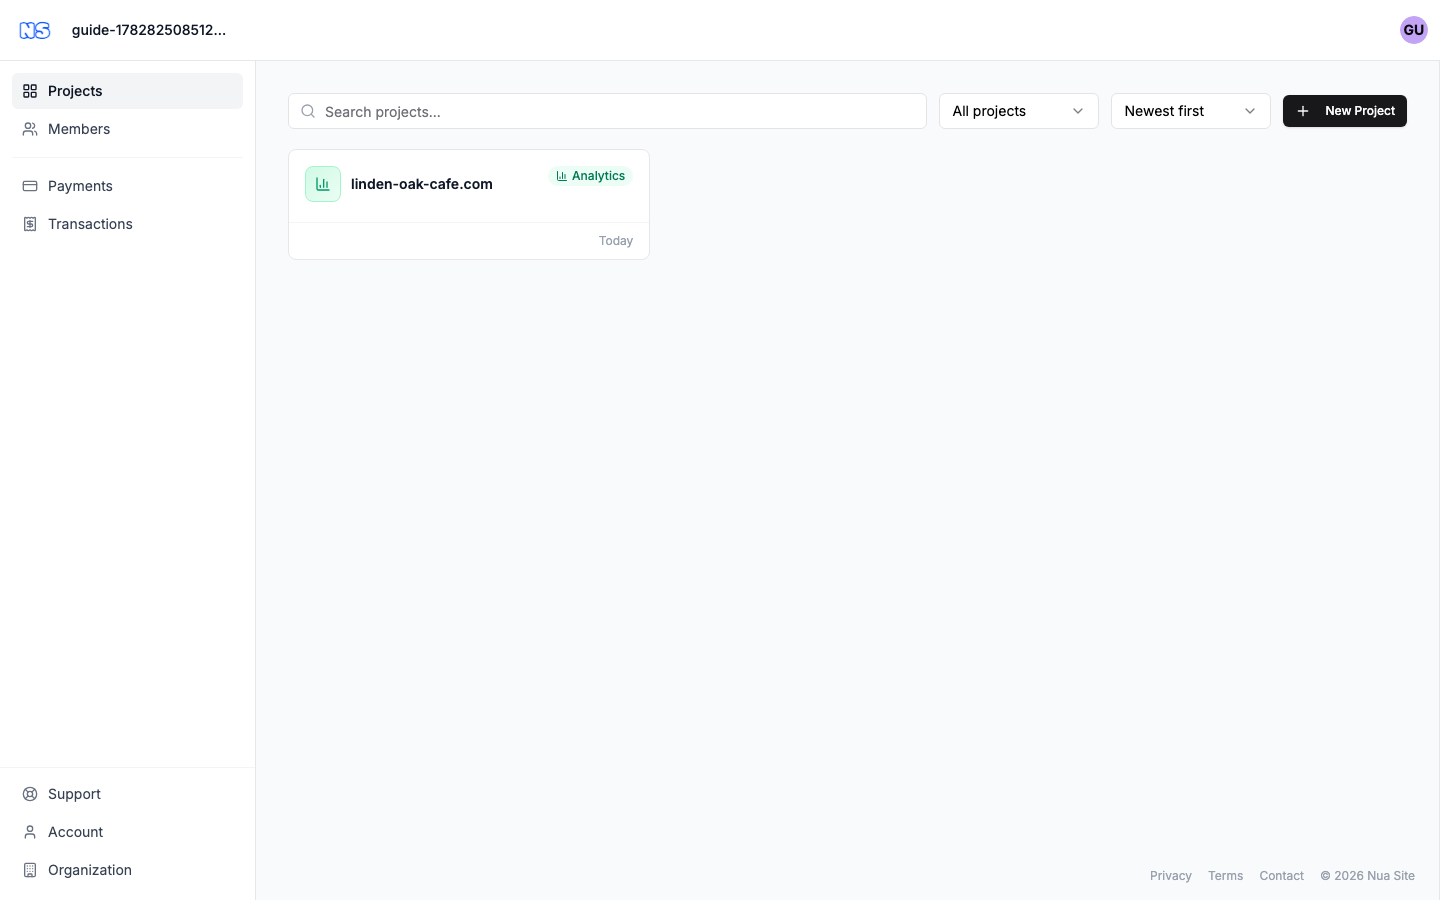
How the dashboard is organized
Three ideas describe almost everything you'll do here:
- Organization — your workspace. Billing, members, and credit all belong to an organization. Most people have just one. If you work with more than one team or client, you can belong to several and switch between them.
- Projects — each website you manage is a project. A project holds your site's setup, its analytics, its forms, and its settings. An organization can have many projects.
- Your account — the personal login that belongs to you: your name, email, password, and connected sign-in methods. Your account is separate from any organization, and you can be a member of more than one.
Tip: Think of it as a filing cabinet. The organization is the cabinet, projects are the folders inside it, and your account is the key in your pocket.
Finding your way around
Once you're signed in, every screen shares the same frame: a bar across the top and a menu down the left.
The top bar
Running left to right:
- The logo on the far left always takes you back to your Projects list — your home base.
- Next to the logo is the organization name. If you belong to more than one organization, this becomes a switcher: click it to see your current organization, switch to another, or Create organization. If you only have one, it simply shows its name.
- When you're inside a project, the project name appears here too, so you always know where you are.
- On the far right is your account menu — click your avatar to open it. From there you can jump to your Account settings or Sign Out.
The left sidebar
The sidebar is your main navigation. Depending on your role, you'll see:
| Item | What it's for |
|---|---|
| Projects | The list of all your websites. Open one, search them, or create a new one. |
| Members | The people in your organization and their invitations. |
| Payments | Your credit balance and payment methods. (Shown if you manage billing.) |
| Transactions | A history of charges and top-ups. (Shown if you manage billing.) |
| Support | Opens a help panel where you can reach us without leaving the page. |
| Account | Your personal settings. A blue badge here means you have a pending organization invitation waiting. |
| Organization | Your organization's settings. (Shown if you manage billing.) |
Note: Some items only appear if you're allowed to manage billing for the organization. If you don't see Payments, Transactions, or Organization, that's expected — someone else on your team handles billing.
Your credit balance
The dashboard runs on credit you top up in advance. Your current balance and payment methods live under Payments in the sidebar (when you manage billing). If a hosting payment ever fails, the Projects page shows a clear banner at the top with a link to fix it.
How to read this guide
The guide is split into sections that mirror the dashboard:
- Getting started (you're here) — sign in, accept the terms, and learn the layout.
- Organization & billing — manage your organization, invite members, top up credit, and review transactions.
- Projects — create a site, read the project overview, and adjust settings.
- Analytics & tracking, Visitor insights, and Forms — everything you do inside a project once it's live.
Each page is a short, task-based "how to." Look for bold labels that match the buttons and menu items you'll see on screen, and watch for Tip, Note, and Warning callouts.
Ready? Head to Signing in to get into the dashboard, or jump straight to managing your account.