Hosting and domains
Connect a custom domain, configure DNS, choose a hosting plan, and move your project's repository.
The Hosting page is where you put your site on your own domain. You enter the domain you want to use, add a few DNS records at your domain registrar, and pick a hosting plan. This guide walks through each step.
To open it, select your project and click Hosting in the left sidebar (under Modules).
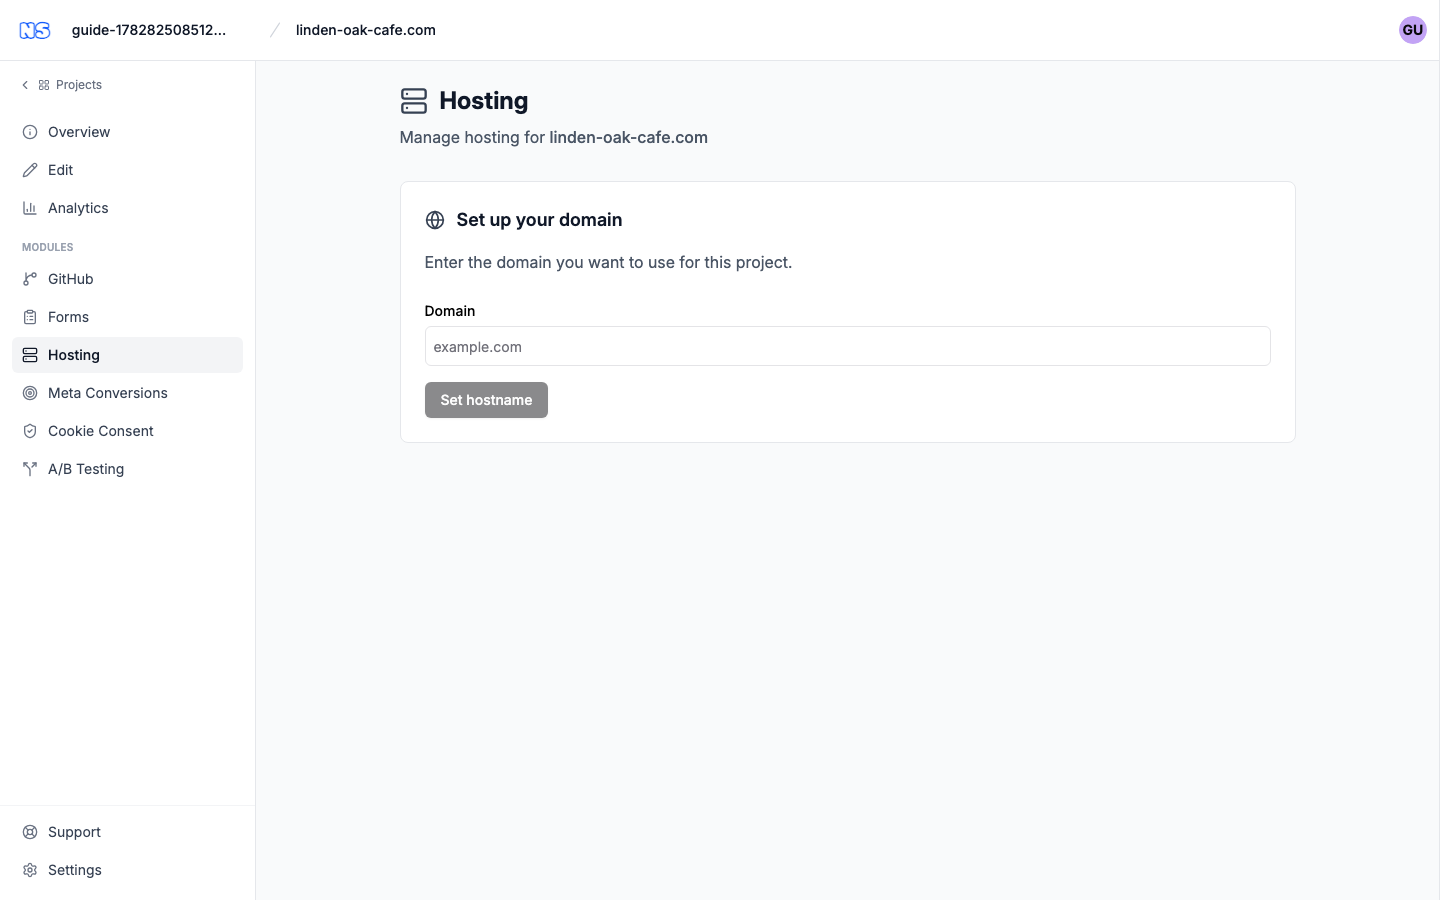
Set up your domain
The first time you visit Hosting, you'll see the Set up your domain card.
- In the Domain field, type the domain you want to use (for example,
example.com). - As you type, a preview appears under Your site will be served at showing the
exact address visitors will land on. For a normal domain, your site is served at
the www. version (for example, **www.**`example.com`), and the bare domain
(
example.com) redirects here. If you enter a subdomain (such asblog.example.com), it's used exactly as typed. - Click Set hostname.
After you set the hostname, the page switches to the DNS Configuration view so you can point the domain at our servers.
Configure DNS
The DNS Configuration card lists every DNS record you need to add at your domain registrar (the company where you bought the domain). The intro line says it plainly:
Add the following DNS records at your domain registrar to point your domain to our servers.
Each domain gets its own card with a status badge and a table of records. The table columns are:
| Column | What it means |
|---|---|
| Record | The hostname the record applies to. |
| Type | The DNS record type — A, CNAME, or TXT. |
| Value | What to paste as the record's value. Use the copy icon next to it. |
| Purpose | Why the record exists (see below), plus a verification badge once it's confirmed. |
You'll typically see a few kinds of records:
- An A record (for a bare domain like
example.com) or a CNAME record (for a subdomain likewww.example.com) — these route traffic to our servers. - A TXT record labelled Ownership verification — proves the domain is yours.
- A TXT record labelled SSL validation — lets us issue the HTTPS certificate.
To add a record, open your registrar's DNS settings, create a new record of the listed Type, and copy the Record name and Value across. The copy button beside each value puts it on your clipboard.
Tip: Prefer importing a zone file? Click Download BIND zone at the bottom of the card to download a standard BIND-format file with all the records. Many registrars can import it directly. Add it to your existing zone — don't replace the zone.
Check the status
DNS changes can take a little while to propagate. Once you've added the records, click Check Status in the top-right of the DNS Configuration card to re-verify them.
The status badge on each domain card tells you where things stand:
- Active — the domain is verified and serving your site.
- Pending / DNS Not Configured — the records haven't been detected yet. Give it a few minutes and click Check Status again.
- Error — something needs attention. If it persists, contact support.
Once a record is verified, its Purpose column shows a badge:
- Verified — safe to remove — the ownership check is done; you can delete this record if you like.
- Verified — keep for SSL renewal — leave this record in place so your HTTPS certificate can keep renewing automatically.
Choose a hosting plan
Verifying your domain points it at our platform; a hosting plan is what actually serves traffic. Plans appear on the same page once a domain is set up.
- If more than one plan is offered, compare them in the Choose a Plan cards. Each card lists what's included and its price.
- Use the Monthly / Yearly switch to change the billing cycle. Yearly billing may show a discount badge.
- Click Activate hosting (or Switch to this plan if you already have one). You'll be taken to a secure checkout to complete payment.
After checkout, a green Hosting subscription activated successfully message confirms you're live.
Manage your current plan
When a plan is active, a Current Plan card shows its name, price, and a status badge:
| Badge | Meaning |
|---|---|
| Active | Your subscription is in good standing. |
| Past Due | A payment didn't go through — update your billing to avoid interruption. |
| Suspended | The subscription is suspended and your site isn't being served. |
| None | No active hosting plan. |
To change plans, pick a different card and click Switch to this plan.
Cancel hosting
To stop your subscription, click Cancel Hosting on the Current Plan card and confirm. As the dialog explains, your custom domains stay attached so you can resubscribe later without redoing DNS — but traffic to your domains stops being served until you activate a plan again.
Remove a domain
To detach a domain entirely, click Remove on its card in the DNS Configuration section and confirm. This unregisters the domain from our hosting provider; the DNS records are no longer needed and requests to the domain will stop working.
Move the repository
Your site's files live in a GitHub repository. To create a fresh repository for the project — or to connect one for the first time — open the GitHub link in the project sidebar.
- If the project has no repository yet, the page is titled Connect to GitHub: a new GitHub repository is created and your project files are pushed to it.
- If a repository is already connected, the page is titled Move repository: a new repository is created and the current one is no longer connected. A warning banner shows which repository you're replacing.
To proceed:
- If prompted, click Connect GitHub and sign in so we can access your repositories.
- Choose the GitHub account or organization (installation) and confirm the repository name.
- Click Connect repository (or Move repository). You'll be taken to a status screen that tracks the connection as it runs.
Note: If the project is locked, unlock it first (open the project's session) — the GitHub integration is unavailable while a project is locked.
Related
- Deploy API — trigger deployments to your hosted site from CI or any HTTP client.
- History and changes — review deployments and undo unpublished edits.